
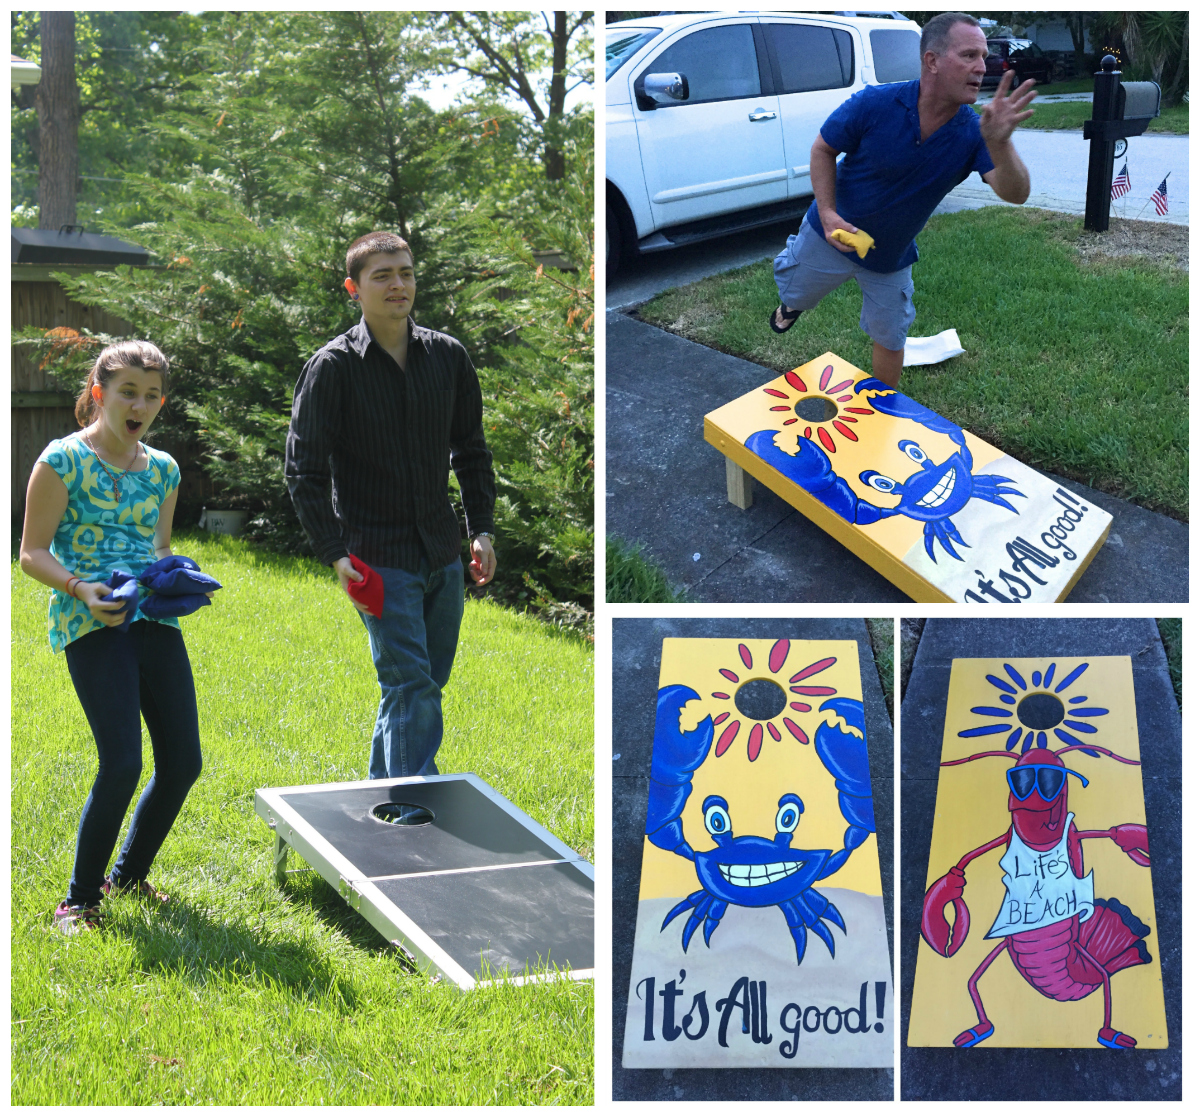
We’ve had hours of fun through the years playing corn hole on holidays or at parties and this year I decided to make my own set of corn hole game boards to have on hand. Since its sunny and warm 90% of the time where we live in Florida, its a good game to have on hand to pull out after a swim in the pool and some good family fun.
I must admit – I don’t have wood-working skills, and because of that, I enlisted the help of a friend who does to make the boards for me. He agreed to outline his process so that I could share it. If you’re good with tools and wood, then these instructions give you an exact step-by-step process for making corn hole game boards.
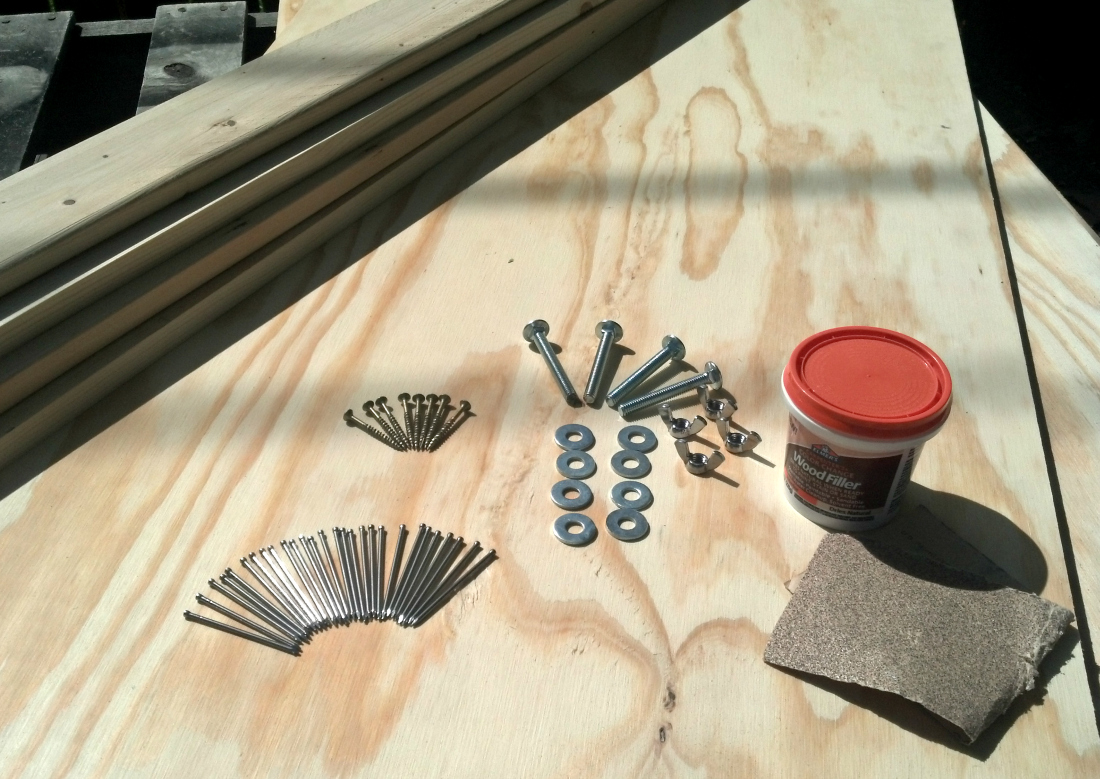
Supplies
- 4 – 1″ x 4″ x 8′ boards
- 2 – 1/2″ plywood sheets, 24″ x 48″, (we had store cut full sheet – no extra charge)
- 4 – 5/16″ x 2-1/2″ carriage bolts
- 8 – 5/16″ flat washers
- 4 – 5/16″ wing nuts
- 16 – 8 x 1-1/2″ exterior countersink wood screws (hex or Phillips head)
- 32 – 8 x 2″ finishing nails
- Wood filler
- 50 grit sandpaper
- Paint primer (if using light color paint), quart
- Paint/primer (choice of color[s]), quart
- Paint brush – 3″- 4″ (size may vary depending on your design)
- Varnish, gloss, quart
Tools Needed
- Pencil
- Tri-square
- Screwdriver (hex or Phillips head)
- Pliers
- Saws – circular or miter, jig
- Punch
- Hammer
- Clamps – 3″ (at least 2)
- Drill, electric or battery
- 5/16″ drill bit
- 6″ circle template (we used an inverted soup bowl)
- Putty Knife
- Sander – hand or electric
Corn Hole Game Boards Step by Step Instructions
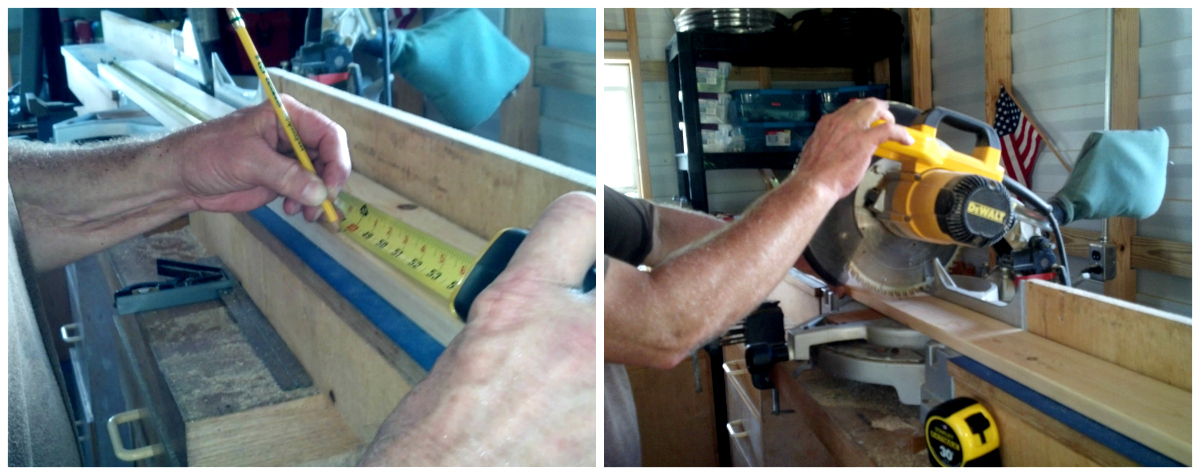
STEP 1 – Side Rails
- Cut no more than 1/4″ off end of each 1″ x 4″ x 8′ to make a clean, square edge.
- Cut a 48″ piece off each 1″ x 4″ x 8′, set aside four (4) of the 1″ x 4″ x 4′ to use as side rails.

STEP 2 – Create Four (4) Legs
- Using the remaining four (4) – 1″ x 4″ x 4′ cut one 12″ piece off each. These cut pieces are the legs.
- The remaining 3′ pieces are used to create the top and bottom rails.
- Using a tri-square and circular/miter saw, mark and cut 45 degree angles on each corner of one end of the four leg pieces.
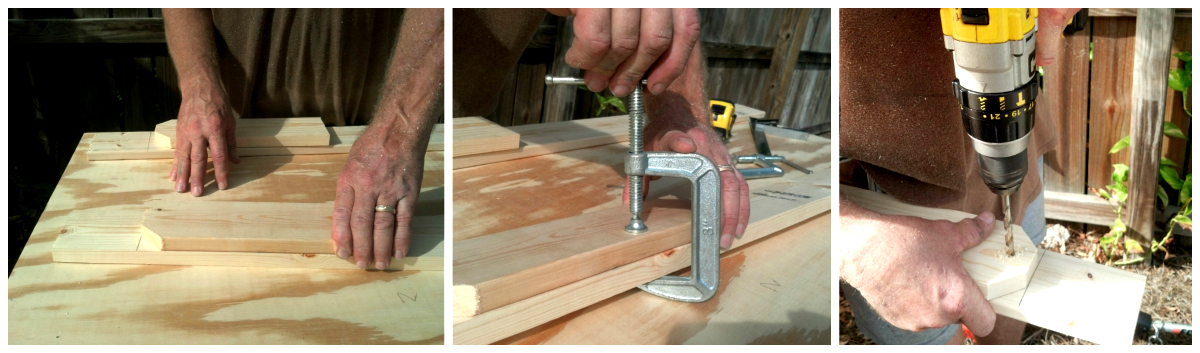
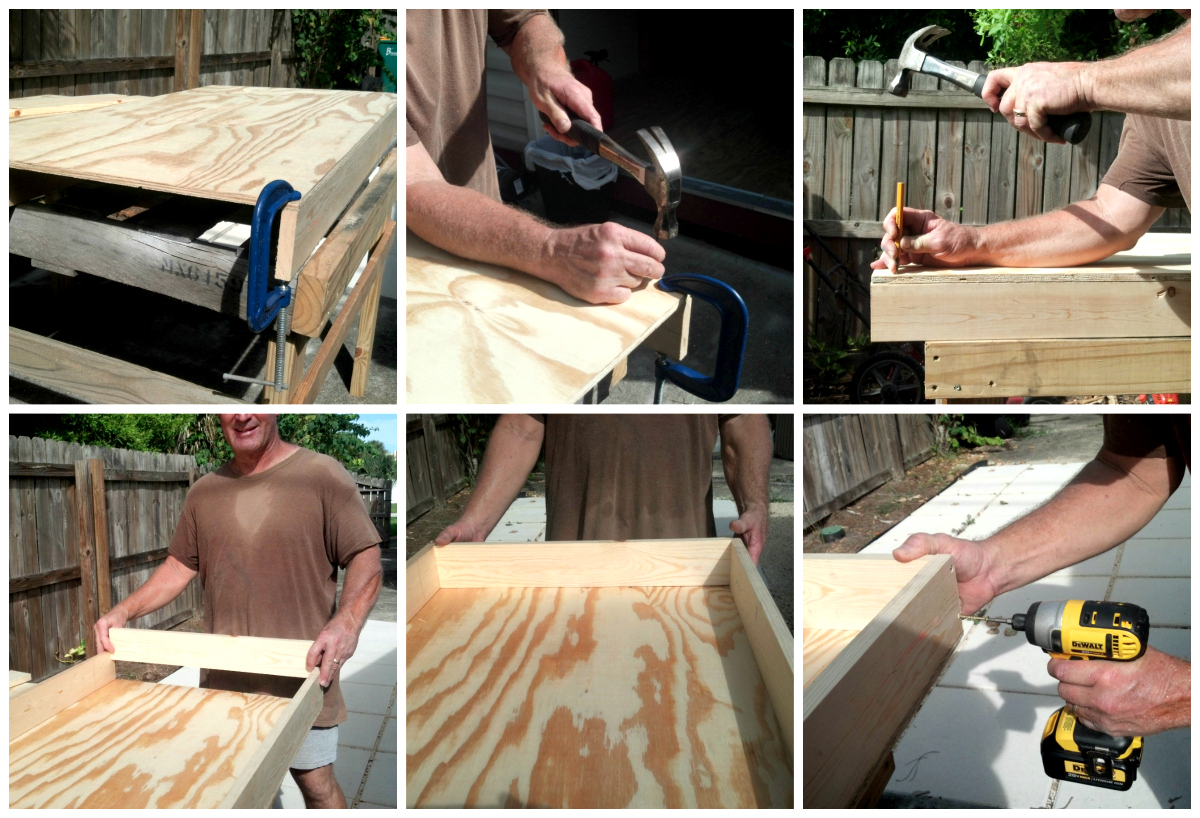
STEP 3 – Attach Legs to Side Rails
- Use four (4) of the 1″ x 4″ x 4′, and put the best side out.
- Measure 4″ from the top end marking on the inside of side rail, and measure 3/4″ from top edge to make a center mark on the leg.
- Next, Line up top of leg with 4″ mark and clamp.
- Drill a 5/16″ hole through leg and side rail and remove clamp.
- Add bolt (1) through side rail, add washer (1), add leg, add another washer (1) and tighten with wing nut (1).
- Repeat above steps to attach remaining three (3) legs.
NOTE: Once attached to side rails, the legs will be aligned near the top of the corn hole game boards next to the hole and will fold under for easy storage
STEP 4 – Build Corn Hole Playing Surface
- Align plywood flush and clamp to the two (2) 1″ x 4″ x 4′ side rails (legs at top and facing inside).
- Nail each end with one (1) finishing nail.
- Space evenly and nail in three (3) additional finishing nails along length of each 1″ x 4″ x 4′ side rail.
- Using punch and hammer, counter-sink each nail.
- To cut pieces for top and bottom rails use two of remaining 1″ x 4″ x 3′.
- Flip boards over and measure width as measurements may vary after attaching the side rails to the plywood.
- Using circular/miter saw, cut 1″ x 4″ x 3′, based on your top and bottom measurements. Then, insert cut 1 x 4’s into top and bottom and secure each side with one (1) screw, and counter-sink.
- Flip over and nail three (3) finishing nails at 6″, 12″ and 18″ increments, and counter-sink.
- Repeat this process to build second corn hole board.
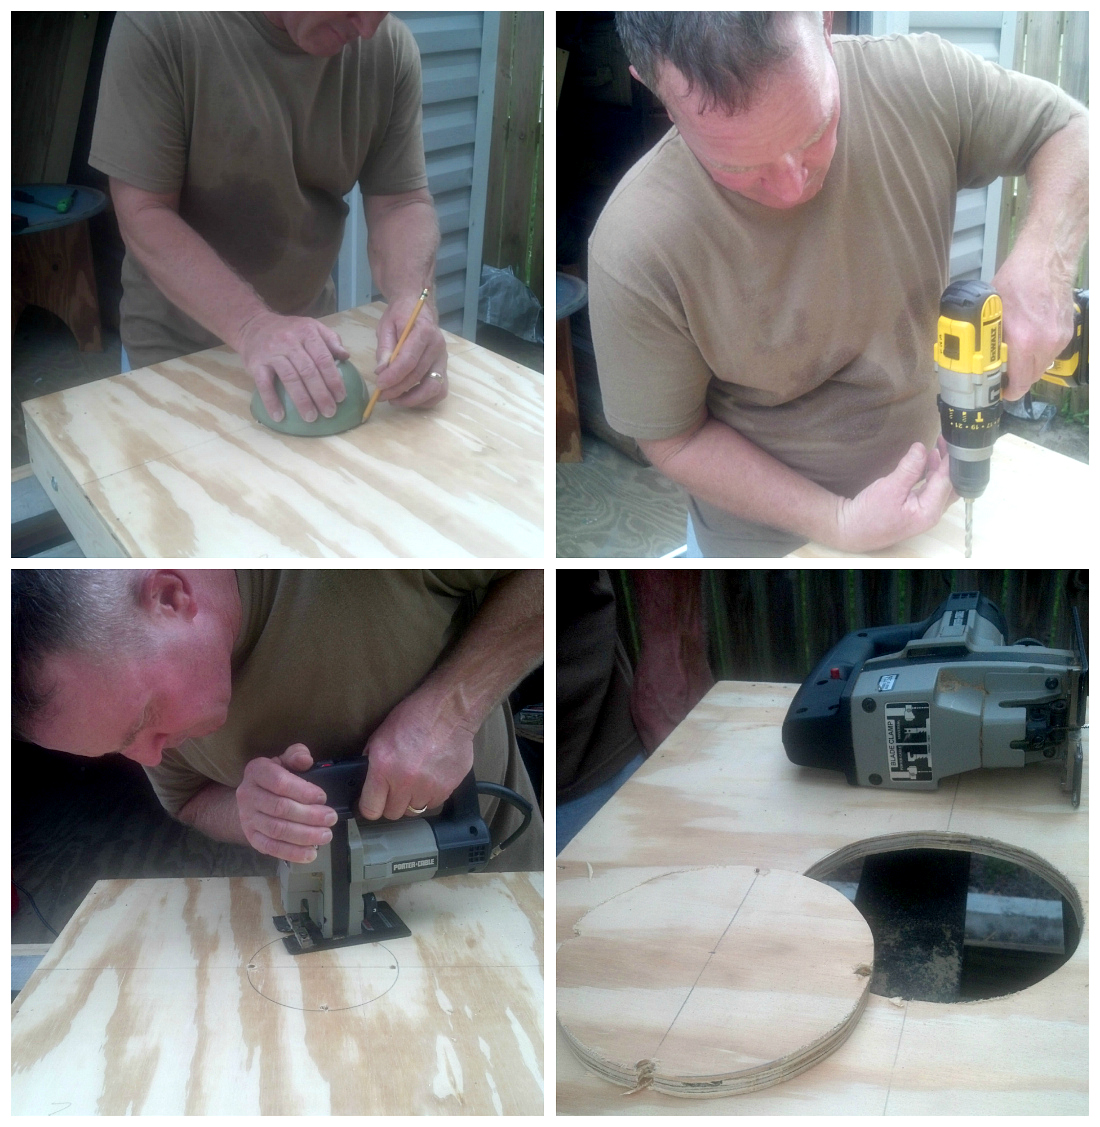
STEP 5 – Cut Hole
- Measure 9″ from top and mark on each side.
- Find center at 12″ and draw a line across to mark.
- Mark 3″ from center in all four directions (top/bottom/left/right).
- Draw a 6″ circle connecting the points.
- Drill four (4) 5/16″ holes (top/bottom/left/right) and make sure to stay inside your circle.
- Using a jig saw, slowly cut out circle.
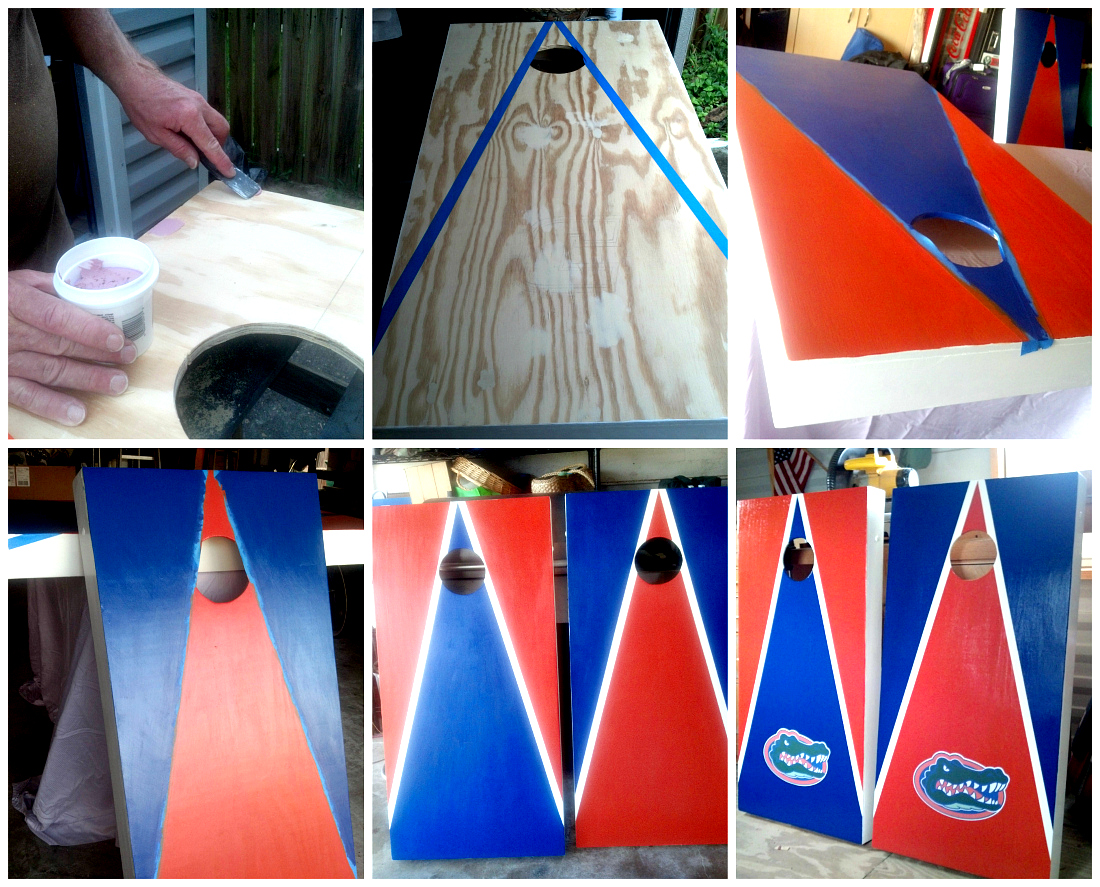
STEP 6 – Final Touches
- Fill all nail and screw holes with wood filler, and allow to dry. Then, using hand or electric sander, lightly sand and wipe entire surface before painting.
- Paint with solid color(s), and add design or decals to reflect your personal flair and interests.
- If using lighter colors and you don’t want wood grain to show through paint, use primer in addition to paint with primer.
- Finish with three coats of gloss varnish to help the paint last.
PAINTING NOTE: For this Florida Gator themed set of corn hole game boards we used the school colors of orange, blue and white. For the white stripe, use 1″ painters tape when painting orange and blue, then removed, taped over the orange and blue, painting the solid white for clean, crisp lines. Then add the decal and varnished.
No Comments